medallion-a-long

~CLOSED~ Submissions for PMQG Quilt Show--2014 Medallion Quilts

Happy New Year, guildies!

It's time to submit your 2014 Medallion Quilts for our PMQG Quilt Show that will hang at Modern Domestic in February.  Submissions are now closed, thank you.


To submit, please send the following to PMQGEvents@gmail.com with the subject "Medallion Quilt Submission" Submissions are now closed.
  • Name and Email Address
  • Completed Quilt Size
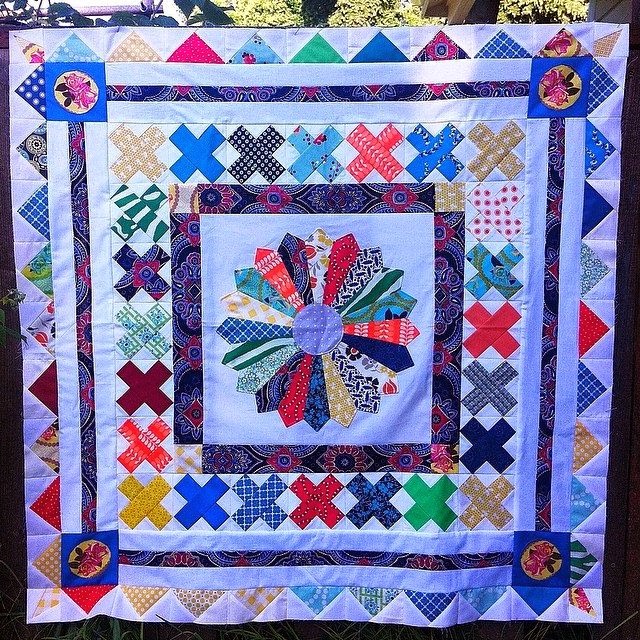
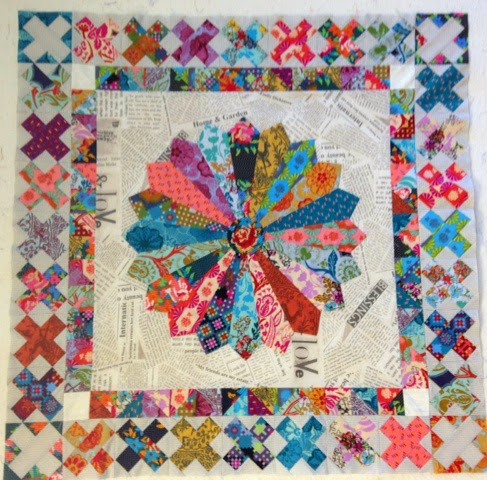
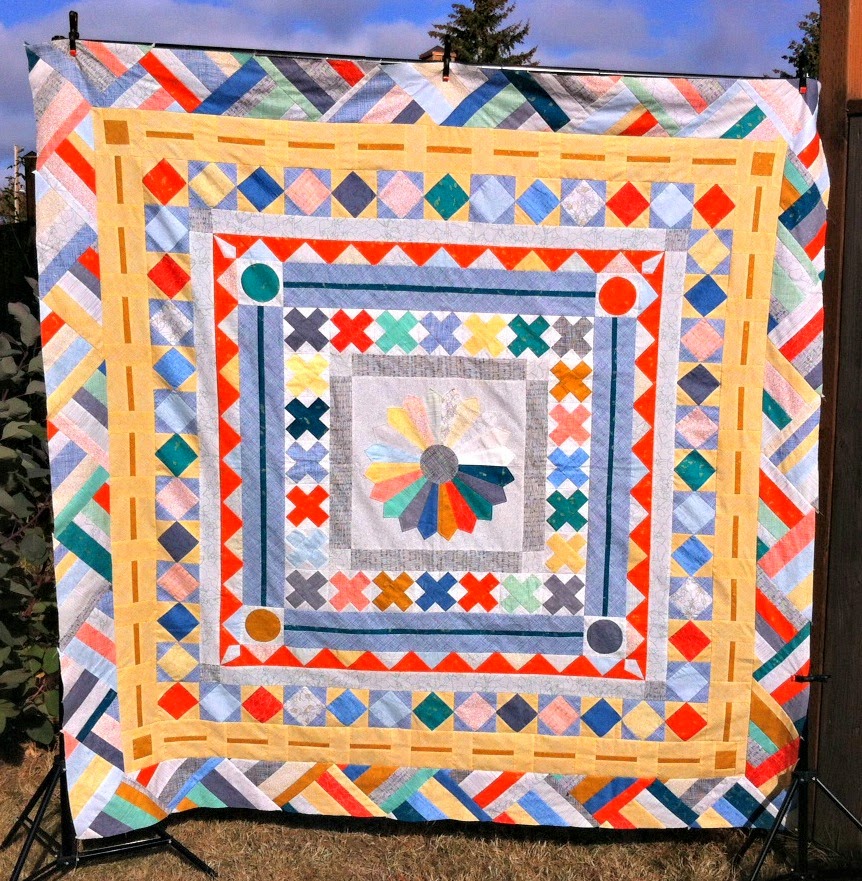
  • 1 picture of the entire quilt
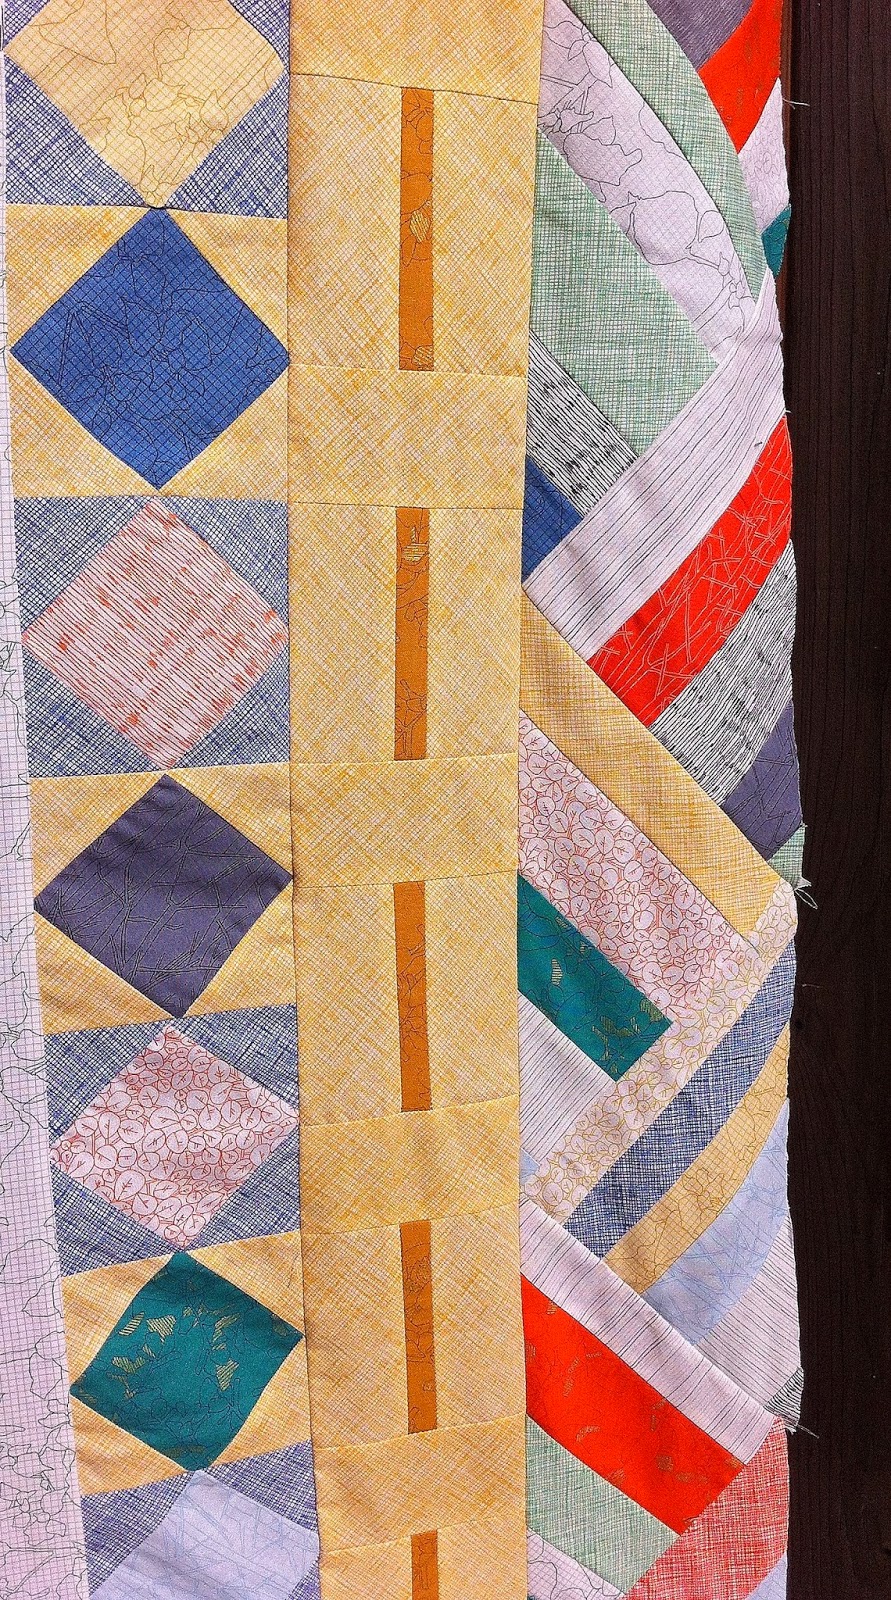
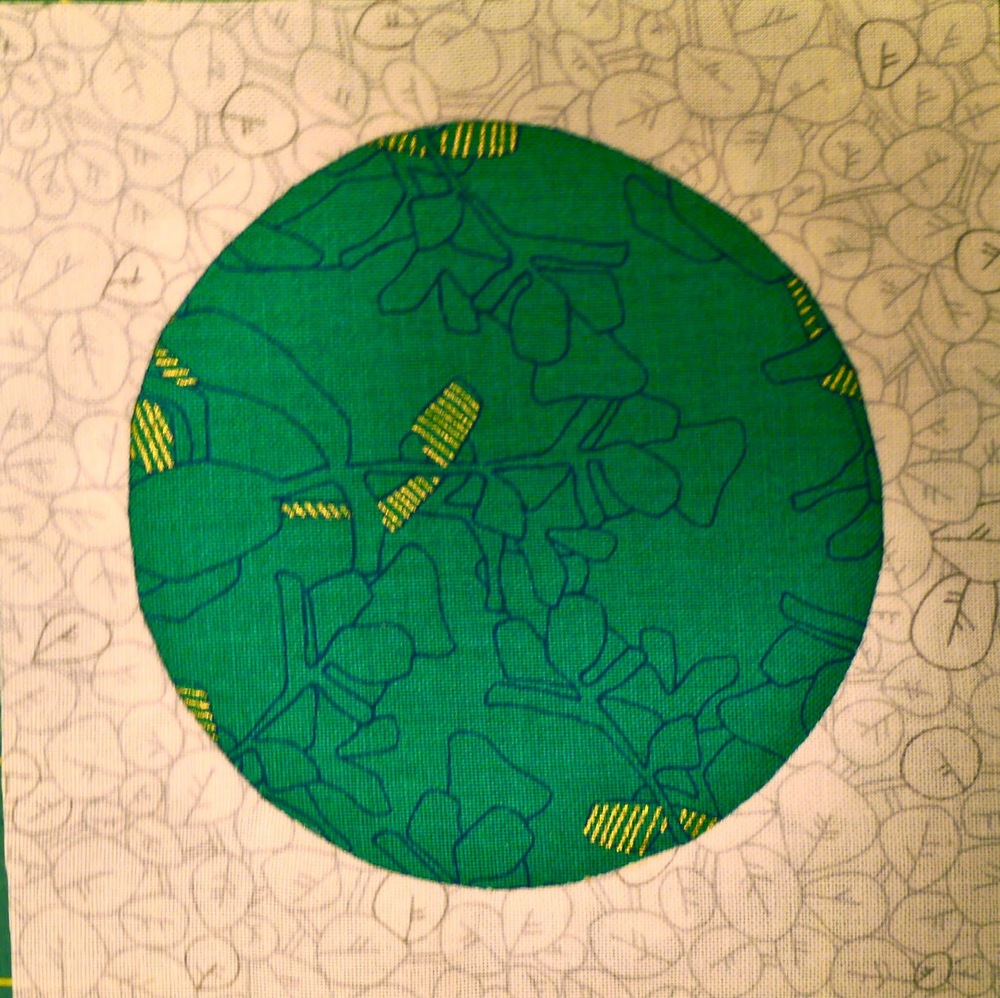
  • 1 close-up picture
We are doing our best to include all the quilts submitted, but size restrictions may not allow that. Submit your quilts from now through Midnight, January 9th. Notifications will go out on January 12th if your quilt will be included in the show. If included, please bring your quilt to our January 15th meeting at St. Andrew Catholic Church. If unable to make the meeting, please send your quilt with a friend, or you can make later arrangements with quilt show coordinator Rachel to get the quilt to Modern Domestic.


Medallion Along : September/Round 8

Robert Kaufman sponsored guild quilt made with Carolyn Friedlander's Botanics fabrics

Instead of a Block of the Month this year, we are doing a Medallion Along! Join us each month as we introduce a new round. We will introduce new rounds through September and hope that gives people time to finish their quilts by December's meeting, where we will have a mini exhibition of them. The completed quilts should finish around 74 inches square.

Hello! You've made it to the last border of the medallion along 2014! To finish off our beautiful medallion quilts we chose a braided or woven-look border that is fairly simple to execute but looks complex. My favorite type of quilting!


To get started, measure your medallion and confirm it is 60 1/2" on both sides. Note: all seams are 1/4".

Step 1.) Cut approximately (125)  8" stripes for your border blocks that range from 1 1/4" to 2 1/2" (you may need a few more or less depending on how wide you cut your strips). Sew strips together to make square blocks, press seams how you prefer, and then trim down to measure 7 3/4" x 7 3/4".  You will need 26 blocks.

Step 2.) Separate your blocks into 2 stacks.
Stack A: place 14 blocks vertical
Stack B: place 12 blocks horizontal. Then cut each block on the diagonal top left to btm right as shown in the picture keeping the orientation correct for each stack and each block.


Step 3.) With all blocks cut into triangles it is now time to arrange your borders. I found it helpful to layout all 4 of the borders first and then sew each row. Start with an outside triangle which is from the A stack of vertically cut blocks. Next place a B stack triangle from the horizontally cut blocks. (see photo below) Repeat until you have 13 triangles laid out, 7 outside A triangles and 6 inside B triangles.


Step 4.) To sew the triangles pieces together you will need to stagger the triangles so that there is a 1/4" hang on either side. (see photo below) This will allow a seam allowance for top and bottom. Press to the side each time you add a new triangle.


Step 5.) To attach the borders to the medallion quilt you will need to use Y-seams at the 4 corners. You can do this! Y-seams get a bad rap but they are easy if you set it up right in the beginning. Before stitching your border to the quilt mark each corner of your quilt at 1/4" from the end. You will end up with 8 small 1/4" marks, 2 on each side of your corners. (check out that small blue dot 1/4" from the edge in photo below)


Step 6.) Pin your border to your quilt top. Start with top/bottom borders and line up the point of your first triangle with the edge of you quilt (half of the triangle will overhang the quilt). Then start stitching at your marked 1/4" line all the way to the opposite side and the next marked dot at the end of the border. Press how you prefer. Repeat for all four sides.


Step 7.) Sew border edges with Y-seams. Take the 2 raw edges of the triangles that over hang the quilt and place right sides together and fold the quilt in half diagonally so that they lay flat from the marked points. (this might take a bit of finagling) Sew from the marked points on the quilt to the end of the triangles. Press seams open and admire that Y-seam. (don't be afraid to rip out the seam and try again if it's looking a bit bunched or doesn't lie right) (also I don't have a photo of this step but if you need help google: y-seam how to and lots of good tutorials pop up) Repeat for all 4 seams and you are done!

Step 8.) Pat yourself on the back and high five somebody 'cause you just made a medallion quilt!


If you have any questions please leave a comment and I will respond as best I can!
Thanks!
Kelly

Remember, we will be displaying these quilts in December at our holiday party/meeting, so that is your goal to finish them and get them quilted! Also, some will hang in Modern Domestic in February, how fun!

Medallion Along: August/Round 7

Robert Kaufman sponsored guild quilt made with Carolyn Friedlander's Botanics fabrics


Instead of a Block of the Month this year, we are doing a Medallion Along! Join us each month as we introduce a new round. We will introduce new rounds through September and hope that gives people time to finish their quilts by December's meeting, where we will have a mini exhibition of them. The completed quilts should finish around 68 inches square.


Before beginning, your medallion should measure 52.5 inches square.

This month, we're using strip piecing to create our round. Alternating squares of strip pieced blocks with rectangles creates the look of a stitched line.

Step 1:
For Strip Sets
Cut (4) 1 inch strips Width of Fabric (about 42") for center strip fabric (contrast fabric)
Cut (8) 2.25 inch strips Width of fabric (about 42") from background fabric
Cut (32) - 4.5 inch x 2.5 inch rectangles from background fabric 

For Corner Stones:Cut (4) - 2.5 inch squares from contrast fabric 
Cut (8) - 4.5 inch by 1.5 inch rectangles of background fabric
Cut (8) - 2.5 inch by 1.5 inch rectangles of background fabric
Step 2:
Sew a 1 inch strip between two 2.25 inch strips, ironing seams open.  Repeat 3 more times, creating 4 strips of 4.5 inch by 42 inch strips that have a line going down the middle.  From each of these strips,  cut (9) 4.5 inch by 4.5 inch squares.  You should now have (36) 4.5 inch by 4.5 inch blocks with a line going down the center.  
Step 3:
For each corner stone, sew a 2.5 inch by 1.5 inch rectangle of background fabric on either side of 2.5" square contrast fabric.  Press seams to the center square.  Sew 4.5 inch by 1.5 inch rectangle of background fabric on remaining sides, pressing seams to the center.

Step 4:
For each side of the medallion, you will use (9) - 4.5 inch square line blocks and (8) - 2.5 inch by 4.5 inch rectangles of background fabric.  Start with a lined block and alternate sewing together a lined block and a rectangle, pressing seams to the rectangle side. Sew four strips. Take two of these strips and stitch to the top and bottom of your medallion. Press as you like. (I generally press in towards the center of the medallion). Sew a cornerstone to each side of the remaining two strips, and then sew them to the left and right sides ot the medallion. Press as you like.

Your medallion should now measure 60.5 inches square. Only one more round to go!


Medallion Along: July/Round 6

Robert Kaufman Sponsored guild quilt made with Carolyn Friedlander Botanics fabrics

Instead of a Block of the Month this year, we are doing a Medallion Along! Join us each month as we introduce a new round. We will introduce new rounds through September and hope that gives people time to finish their quilts by December's meeting, where we will have a mini exhibition of them. The completed quilts should finish around 60 inches square.

The July round consists of 48 Square in a Square blocks. We have provided 2 different ways to make these blocks. (a third paper pieced one coming soon)
Before beginning, your medallion should measure 44.5 inches square.

Step 1:  Use one of the following options to make (48) 4.5 inch Square in a Square blocks.  When done, move on to Step 2 below.


Option A: Use a corner block stitch and flip method.

Cut (48) 4.5 inch squares of your center fabric. Cut (192) 2.5 inch squares. Draw a line from corner to corner on the back of each of the 2.5 inch squares* (as you would for half square triangles). Pin the smaller squares to the corners of your center blocks and stitch along the line. Trim 1/4 inch seam allowance and press. * Kelly has a tip on her blog if you would like to skip the drawing a line step! Find it here!

Pros: This is a good option for fussy cutting, and if you utilize your corner square scraps you can have another project in the works! Good for chain stitching. If you stitch another line 1/2 inch away from your first one when making the corners, you can make tiny half square triangles as you go!
Cons: May be a bit wasteful of fabric if you don't utilize the scraps.

After creating your 48 blocks, move on to step 2.


Option B: Cut Half Square Triangles and stitch onto the four sides of the center block.

Cut (48) 3 3/8 inch center squares. Cut (96) 2 7/8* inch squares for the side. Cut them in half along the diagonal, giving you 192 Triangles. To stitch, center a triangle on one side of a center block and stitch with a scant 1/4 inch seam. Stitch the opposite side's seam and press. Then stitch on the remaining two sides and press. A 4.5 inch square ruler to help square up at the end is very helpful.

*My second run-through I cut the corners at 3 inches and it gave a bit more wiggle room when squaring up


Pros: Uses less fabric than other method, is fast to chain stitch

Cons: Not good for fussy cutting the center square since it will be on an angle in the finished square. Also, working with bias edges and 1/8 inch measurements. A scant seam is very important here.

After creating your 48 blocks, move on to step 2.


Option C: Paper Pieced Blocks. Download and save this pattern:
Generations Quilt Patterns 4 inch Square in a Square

Open up the saved pdf file and print one copy, making sure to select "no scaling" or "actual size" (my test print was 1/4 inch off the test print because it was on "shrink to size" rather than actual size." Measure the printed piece to make sure that with seam allowances the block is exactly 4.5 inches. When you've got it right, print out 23 more copies of the pattern.

Need tips on paper piecing? Follow these directions about halfway down the page!
Paper Piecing 

After creating your 48 blocks, move on to Step 2


Pros: Super precise and beautiful seams!
Cons: Uses paper and printer ink, have to spend time removing paper

 
Step 2: Stitch 2 strips of fabric 9 blocks wide. Stitch 2 strips of fabric 11 blocks wide. Attach the 9 block strips to the top and bottom of your medallion. Press seams. Attach the 11 block strips to the left and right of your medallion. Press seams.

Your Medallion should now measure 52.5 inches 

Kelly's Beautiful Medallion!

Medallion Along: June/Round 5

A simple 2.5 inch border, with or without cornerstones

Robert Kaufman sponsored guild quilt made with Carolyn Friedlander Botanics fabrics 

Instead of a Block of the Month this year, we are doing a Medallion Along! Join us each month as we introduce a new round. We will introduce new rounds through September and hope that gives people time to finish their quilts by December's meeting, where we will have a mini exhibition of them. The completed quilts should finish around 60 inches square.


The June round consists of a simple 2.5 inch border. You can use contrasting cornerstones, pick a cornerstone block pattern of your choice, or omit cornerstones as you like!

Before beginning, your medallion should measure 40.5 inches square.

Option A: With Cornerstones

Cut 4 strips at 40.5 inches x 2.5 inches.
Cut 4 squares at 2.5 inches x 2.5 inches

Attach two of the strips to the left and right of the medallion. Press as you like. Stitch the squares to each end of two of the strips, press.. Attach the strips/cornerstones unit to the top and bottom of the medallion and press as you like. Medallion should now measure 44.5 inches square.

Option B: Without Cornerstones

Cut 2 strips at 40.5 inches x 2.5 inches
Cut 2 strips at 44.5 inches x.2.5 inches

Attach the shorter strips to the left and right of the medallion. Press as you like. Attach the longer strips to the top and bottom. Medallion should now measure 44.5 inches square.

Other options: Select a block of your choice for the 2.5 inch cornerstones (a snowball, 4 patch, HST?)

Kelly's Medallion, with cornerstones

Lisa's Medallion, solid border without cornerstones

Medallion Along: May/Round 4


Flying Geese with Paper Pieced Cornerstones

Robert Kaufman sponsored guild quilt made with Carolyn Friedlander Botanics fabrics
Instead of a Block of the Month this year, we are doing a Medallion Along! Join us each month as we introduce a new round. We will introduce new rounds through September and hope that gives people time to finish their quilts by December's meeting, where we will have a mini exhibition of them. The completed quilts should finish around 60 inches square.

The May round consists of 36 Flying Geese with Paper Pieced Cornerstones. By piecing the flying geese using the 4 at a time method, it goes quite quickly!

Before you start, your Medallion should measure 36.5 inches square.


1.) Make 36 flying geese that measure 4.5 inches x 2.5 inches. A variety of methods are outlined below, please use what works best for you.
  • 4 at a Time Method
If using 1, 3, or 9 different fabrics, using the 4 at a time method will work well for you. I like this tutorial found at Connecting Threads (scroll down almost halfway for the 4 at a time method). However, I prefer to make mine a little bit oversized (measurements below) and trim them down on 3 sides. I only straighten the point side, this helps prevent losing your geese points in the seam on the next round, something I find a problem with sometimes. If you want to make them oversized and trim down, follow these measurements:

Cut (9) 5 3/4 inch squares in your "geese" fabric
Cut (36) 3 3/8 inch squares in your background fabric

You want finished 4.5 inch x 2.5 inch flying geese. Using the above measurements and the 4 at a time method you will trim off a decent amount, but will have lovely accurate points when the next round is stitched on;

So this is how I trim them down to ensure that my points will not later get lost:

On the point side, only take off the barest sliver to get the edge straight.


On the opposite side, trim off a bigger piece so that it now measures 2.5 inches wide.


Then you can just trim the other sides evenly down to 4.5 inches.
  • 1 at a Time Method
If you prefer a scrappier quilt with 36 different fabrics for the geese you can just use the 1 at a time method found here.
  •  Paper Pieced Method
You could also paper piece all of your geese.
 Download the flying geese paper pieced pattern here. Click on the down arrow near the top left to download.  You will need 12 copies total (not 11). Thanks to Cath Hall of Wombat Quilts for designing the patterns.

Don't know how to paper piece? There are lots of tutorials online. Here's a video from the blog Ellison Lane that is pretty clear. Plus, here are some paper-piecing tips and tricks from Cath.

2.) Make (4) 2.5 inch square cornerstones. Download the paper piecing template for the cornerstones here.

3.) Stitch 9 geese together, side to side, using 1/4 inch seams. Do this 4 times.

4.) For two of these strips, attach corner stones to each end.

5.) Your starting medallion should measure 36.5 inches square. Attach the strips without cornerstones to opposite sides of your medallion. Iron your seams whichever way seems to reduce bulk the best for you. I attached my strips so that the flying geese are flying "out" away from the center, but you could point them "in" towards the center if you like.

6.) Attach your strips with cornerstones to the other sides, again ironing seams in whichever way reduces bulk best for you.

7. Your medallion should now measure 40.5 inches square.

 
Mary Ann's Medallion


Customize Your Medallion Further!
  • Use a different technique to make your flying geese, such as the provided Paper Piecing pattern
  • Add a solid rectangle or square in between each goose (so you can make less geese!)
  • Make plain cornerstones or a cornerstone pattern of your choice
Kelly's Medallion


Medallion Along: April/Round 3

Circles and Lines


The April round consists of a plain border with a graphic .5” line, set off with circle cornerstones. The border will finish at 4” wide.

Before you start, make sure your quilt top is currently 28.5” square. 

Reverse Circle Cornerstones

This technique requires a fair amount of prep work, but it’s a reliable way to make a perfect circle—and there is no topstitching, which gives a clean look. 


Fabric:

  • Four 5” squares of background fabric
  • Four 4.5” squares of feature fabric for circles


Special tools:

  • freezer paper
  • paper scissors
  • a compass or template for a 3.5” circle
  • fabric glue (or regular glue)
  • zipper foot 


Steps:

1. Cut a 4.5” square from freezer paper, using paper scissors. Fold square in half lengthwise and crosswise, and crease to find the center. 

2. Mark a 3.5” circle in the center of the square using a compass or template. Cut out the circle and set aside. 

3. Grab one of your 5” background fabric squares. Press the shiny side of the freezer paper to the wrong side of background fabric. The paper will stick to the fabric. 

4. Trim away the fabric on the inside of the circle, leaving about  .5” seam allowance. (It doesn’t have to be exact.)


You're basically making a floppy disk.

5. Snip the seam allowance in .5” increments all around the circle. Don’t cut the paper! Then press the tabs to the paper side, making sure they’re flat and firm against the freezer paper. It should look sort of like a flower. 


These tabs aren't actually flat enough. Steam helps!


6. Put a drop of glue on the outside of each tab. With right sides up, center the background fabric over the circle fabric. Let the glue dry. 

Regular fabric glue works better than a glue stick.


7. Carefully remove the freezer paper from the background fabric. Re-press if needed.

It's all coming together now. 

8. Sewing time! Using the zipper foot, sew along the fold line, with the circle fabric on the bottom. Hold the top piece perpendicular to the foot as you sew. Go slow and maintain an even curve. 

The moment of truth! 


9. Press. Trim seam allowance to .25”. Trim the block to 4.5”

10. Repeat to make four blocks. 

No stitching shows! 


Lined Border


Fabric:

  • Eight strips of background fabric, 2.25” wide x 29” long
  • Four strips of line fabric,  1” wide x 29” long

(Or just cut strips the length of fabric and trim after they’re sewn.)


Steps:

1. Sew a strip of line fabric to a strip of background fabric, with right sides together and using a .25” seam allowance. Press toward background. 

2. Sew a strip of background fabric to the line fabric, as above. Press toward background. 

3. Repeat to make 4 borders. Trim to 28.5”. 


Attaching the Borders

1. Sew two of the borders to opposite sides of the quilt top, using a .25” seam allowance.

2. Sew cornerstones to the ends of the other two border strips. 

3. Attach the cornerstone borders to the quilt top. 

Your quilt should now measure 36.5” square. 

So purty!


Alternatives:

  • Use a different technique to make the circle cornerstones—regular or raw-edge applique would work
  • Add an applique circle to the center of each border
  • Make plain cornerstones
Have fun! 


Medallion Along: March/Round 2


Round 2: X Blocks

Before beginning this round, be sure your quilt top is currently at 20.5 inches. 
The March round consists of (24) 4.5 inch “X” blocks. 

Step 1: Stitch the Blocks

Make 24 blocks in either Option A or B.

Option A:  Paper Pieced X Blocks


Elsa's Medallion, Paper Pieced

Option B: Traditionally Pieced Blocks

  • For each block cut:
      (1) strip 2 inches by 6 inches in your X fabric
      (1) strip 2 inches by 7 inches in your X fabric
      (1) 4 inch square (sliced in half on the diagonal) in your background fabric 


    • Sew each side of the two pieces of the square to the six inch strip, centering the pieces on the strip. Press the seams to the outside
    • Slice the block on half on the opposite diagonal and insert the 7 inch strip. Sew back together and press the seams to the center.
    • Square the block up to 4.5 inches 


  • Stitch 24 blocks and then go to step 2

 
Mary Ann's Medallion, Traditionally Pieced


Step 2: Make the Borders
  • Sew your blocks into 2 rows of 5 blocks and 2 rows of 7 blocks.
  • —Attach the rows of 5 blocks onto the left and right sides of your medallion. Press seams outward or open.
  • —Attach the rows of 7 blocks onto the top and bottom of your medallion. Press seams outward or open. 
  • —Your medallion should now measure 28.5 inches! 

Tania's Medallion, Paper Pieced


To Further Customize your Medallion, Try:
  • —Making your traditional pieced blocks with “wonky” cuts (remember to cut more generously sized pieces of fabric to start with.
  • —Using a “Stitch and Flip” method on the corners of Option B to make it look more like Option A (start with a small square, pin to corner of block, stitch on diagonal of square and trim to 1/4inch).
  • —Making only 20 blocks and including 4 cornerstones of solid blocks or your choice of pattern.
Anne's Medallion, Traditionally Pieced with solid Cornerstones, 
and X strips were reduced by 1/2 inch before sewing


Medallion Along--February/Round 1

This month we went with a simple 2.5 inch border so that your medallion would have a nice frame around it. Never fear, next month will definitely be more complicated! Each month we hope to provide a couple of options for different skill levels and different time commitments. This month there are directions for with or without cornerstones.

Botanics Medallion Option A--With Cornerstones


Option A--With Cornerstones

  • ›Measure your Medallion and confirm that it is 16.5 inches
  • ›Cut 4 strips of fabric 2.5 inches x 16.5 inches
  • ›Cut 4 squares of contrasting fabric 2.5 inches x 2.5 inches.
  • ›Stitch 2 strips to the left and right side of your Medallion. Press seams outward (towards squares)
  • ›Stitch 2 squares to each side of the remaining two strips to create cornerstones. Press seams inward (towards strip)
  • ›Pin strips to top and bottom of block, aligning ends and butting seams together at the cornerstones.
  • ›Stitch and press seams outward. 
  • ›Measure to confirm that your Medallion quilt is now 20.5 inches square 
 
Suzanne's Medallion Option B--Without Cornerstones


Option B--Without Cornerstones
  • ›Measure and confirm that Medallion is 16.5 inches
  • ›Cut 2 strips at 2.5 inches x 16.5 inches
  • ›Cut 2 strips at 2.5 inches x 20.5 inches
  • ›Attach smaller strips to right and left of Medallion. Press seams outward.
  • ›Attach larger strips to top and bottom. Press seams outward. Measure and confirm that block is now 20.5 inches


Haven't started your Medallion Along  yet? You can easily catch up! Go to the 2014 Medallion Along tab at the top of the blog page and scroll down to the bottom to get all of the starting information.


Medallion-a-long: Center Ideas

This year, instead of doing a block of the month, we'll be making a medallion quilt, with a new border every month! But you can't have borders until you have that center block. Here are some ideas and tips for getting started.

Important: You can use whatever type of block you want for the center, but it needs to finish at 16.5" for the rest of the pattern to work!

1. Dresden Plate

At the January meeting, Cath demonstrated how to use the Easy Dresden ruler to make this lovely circular block. It's easier than it looks!
Cath's Dresden Plate


Kelly's Dresden Plate


Sew Mama Sew has instructions for making a Dresden with a template--no special ruler needed. And it's already the right size!

And here are instructions for using the Easy Dresden tool that Cath showed us.

2.  Paper-pieced Compass Block

Current PMQG members should have received an e-mail with instructions for a variety of gorgeous paper-pieced Compass blocks designed by Quilting on the Square. Lisa made the Spinning Points block and showed it at the guild meeting.

Note that these patterns are for 12.5" blocks. You can either enlarge the pattern or add borders to make a 16.5" block.

3. Enlarge any paper-pieced block

You can use your printer settings to enlarge a paper-pieced block pattern. Just choose "print," then "page setup." Under "scale," put the appropriate amount. (If the pattern makes an 8" finished block, use 200%. A 12" finished block would need to be enlarged 150%.) Just make sure the printed pattern is the right size before you start piecing!

4. Add borders to any 12.5" block

That's right. You can make your favorite 12.5" block, throw a 2.5" border around it, and call it done.

5. Add your suggestions! 

Did you find a great pattern to use for your center block? Share a link using the blue button below!

2014 Medallion-A-Long Overview


Marcelle Medallion by Carolina Anne on Tumblr
used with permission

This year, instead of doing a block of the month, PMQG is leading a medallion-a-long. A medallion quilt features one center block surrounded by a variety of different borders. Each month, we'll share a different border pattern. Follow along and at the end of the year, you'll have a completed quilt!


By Rachel Hauser of Stitched in Color for her Handstitched Class
Used with permission


Medallion quilts are great for using up scraps, so dive into those scrap bins and get creative! 

This will be a great chance to learn some new techniques. We'll offer variants for many of the borders. Paper pieced? Wonky? With cornerstones or without? You decide! 


Group quilt by Stephanie Serrano and Improvi-Robin Season 1 players
Used with permission
  We will introduce new rounds through September and hope that gives people time to finish their quilts by December's meeting, where we will have a mini exhibition of them. The completed quilts should finish around 60 inches square.

Ready to get started? The first step is to make a 16-1/2" center block. A Dresden Plate (which Cath demonstrated at the January guild meeting, using the Easy Dresden ruler) is a good option. Stay tuned for more suggestions, plus tips for enlarging any block!

Please continue to check the Medallion Along page on the blog for the newest round!