tutorials

Medallion Along : September/Round 8

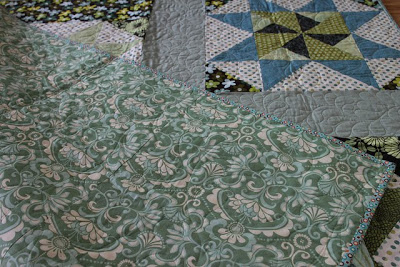
Robert Kaufman sponsored guild quilt made with Carolyn Friedlander's Botanics fabrics

Instead of a Block of the Month this year, we are doing a Medallion Along! Join us each month as we introduce a new round. We will introduce new rounds through September and hope that gives people time to finish their quilts by December's meeting, where we will have a mini exhibition of them. The completed quilts should finish around 74 inches square.

Hello! You've made it to the last border of the medallion along 2014! To finish off our beautiful medallion quilts we chose a braided or woven-look border that is fairly simple to execute but looks complex. My favorite type of quilting!


To get started, measure your medallion and confirm it is 60 1/2" on both sides. Note: all seams are 1/4".

Step 1.) Cut approximately (125)  8" stripes for your border blocks that range from 1 1/4" to 2 1/2" (you may need a few more or less depending on how wide you cut your strips). Sew strips together to make square blocks, press seams how you prefer, and then trim down to measure 7 3/4" x 7 3/4".  You will need 26 blocks.

Step 2.) Separate your blocks into 2 stacks.
Stack A: place 14 blocks vertical
Stack B: place 12 blocks horizontal. Then cut each block on the diagonal top left to btm right as shown in the picture keeping the orientation correct for each stack and each block.


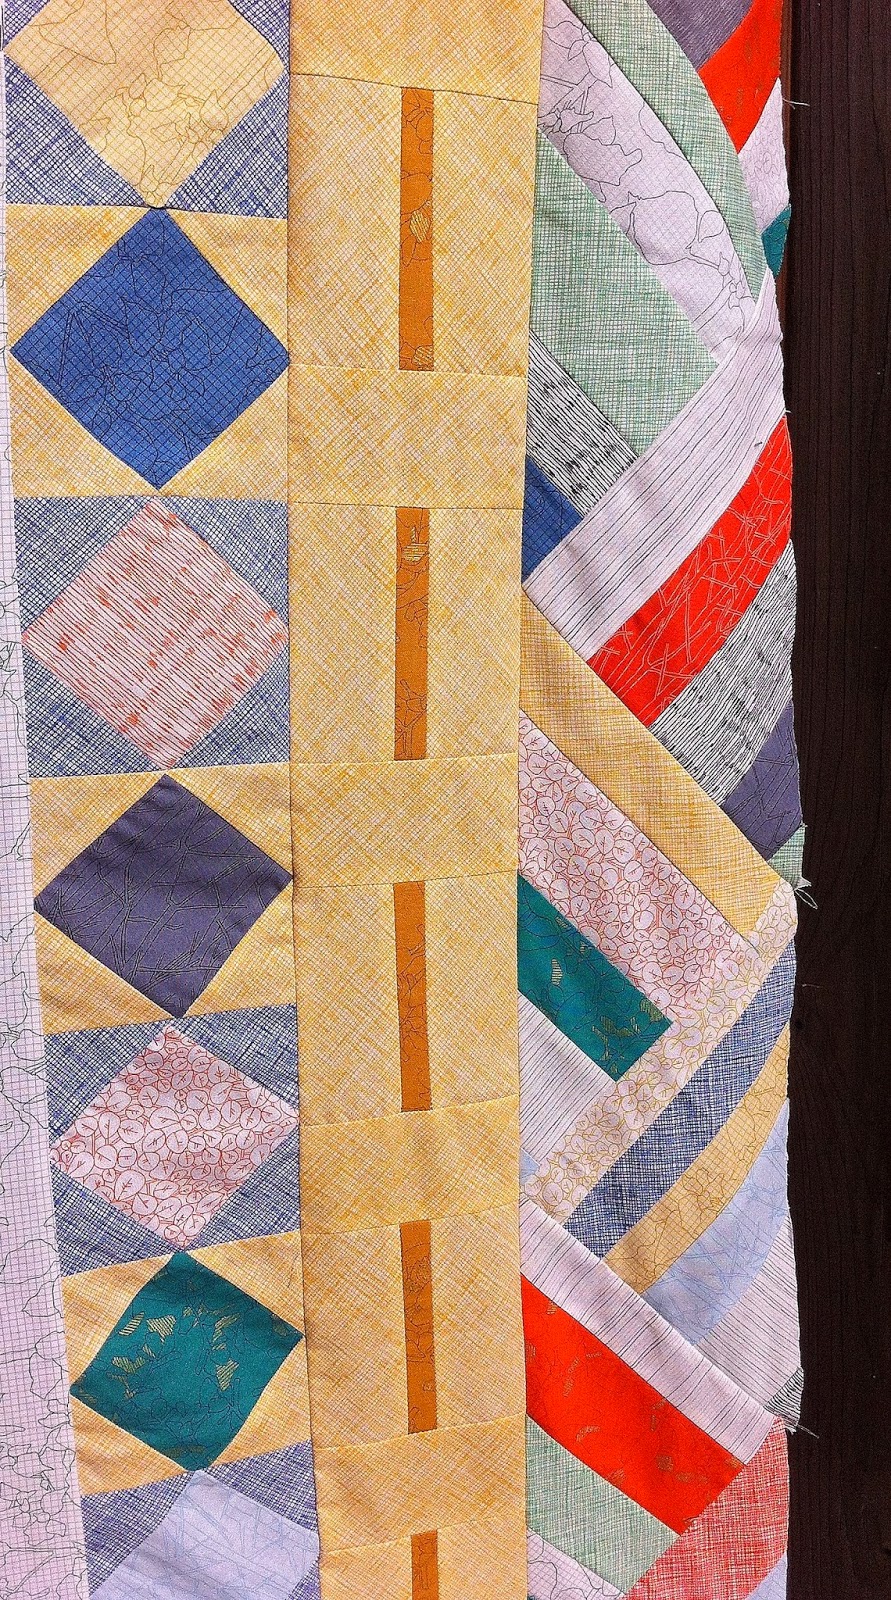
Step 3.) With all blocks cut into triangles it is now time to arrange your borders. I found it helpful to layout all 4 of the borders first and then sew each row. Start with an outside triangle which is from the A stack of vertically cut blocks. Next place a B stack triangle from the horizontally cut blocks. (see photo below) Repeat until you have 13 triangles laid out, 7 outside A triangles and 6 inside B triangles.


Step 4.) To sew the triangles pieces together you will need to stagger the triangles so that there is a 1/4" hang on either side. (see photo below) This will allow a seam allowance for top and bottom. Press to the side each time you add a new triangle.


Step 5.) To attach the borders to the medallion quilt you will need to use Y-seams at the 4 corners. You can do this! Y-seams get a bad rap but they are easy if you set it up right in the beginning. Before stitching your border to the quilt mark each corner of your quilt at 1/4" from the end. You will end up with 8 small 1/4" marks, 2 on each side of your corners. (check out that small blue dot 1/4" from the edge in photo below)


Step 6.) Pin your border to your quilt top. Start with top/bottom borders and line up the point of your first triangle with the edge of you quilt (half of the triangle will overhang the quilt). Then start stitching at your marked 1/4" line all the way to the opposite side and the next marked dot at the end of the border. Press how you prefer. Repeat for all four sides.


Step 7.) Sew border edges with Y-seams. Take the 2 raw edges of the triangles that over hang the quilt and place right sides together and fold the quilt in half diagonally so that they lay flat from the marked points. (this might take a bit of finagling) Sew from the marked points on the quilt to the end of the triangles. Press seams open and admire that Y-seam. (don't be afraid to rip out the seam and try again if it's looking a bit bunched or doesn't lie right) (also I don't have a photo of this step but if you need help google: y-seam how to and lots of good tutorials pop up) Repeat for all 4 seams and you are done!

Step 8.) Pat yourself on the back and high five somebody 'cause you just made a medallion quilt!


If you have any questions please leave a comment and I will respond as best I can!
Thanks!
Kelly

Remember, we will be displaying these quilts in December at our holiday party/meeting, so that is your goal to finish them and get them quilted! Also, some will hang in Modern Domestic in February, how fun!

Member Tutorials

Here is a small list of members tutorials. Enjoy checking them out! 
Disclaimer: By no means is this a complete list! 

Paper Piecing
Make your own English Paper Piecing by Christina of A Few Scraps
Paper Piecing Kit & Tutorial by Christina of A Few Scraps


Binding tutorials
Making and Sewing Binding by Elizabeth of Oh, Frannson!
Binding Tutorial by The Sometimes Crafter
One Seam Bias Binding by Jenn of Quiddity Quilts
Bias and Binding Tape by Susan of West Coast Crafty

Block tutorials
Log Cabin Video Tutorial by Susan of West Coast Crafty
Faster Hourglass Blocks by The Sometimes Crafter
Double Disappearing Nine Patch by Christina of A Few Scraps
Disappearing Nine Patch by The Sometimes Crafter
One Seam Flying Geese by Jenn of Quiddity Quilts
Magic Hourglass by Monica of Happy Zombie

Free Motion Quilting
Free Motion by Elizabeth of Oh, Fransson!

Quilt Tutorials
Bow Tie Block by Michelle of Design Camp
Wabi Heart Mini Quilt by Sew While He Sleeps
Scrappy Back Tutorial  by Kelly of Blue Bird Sews

Pillows
True Love - His and Hers Pillows by Jen Carlton Bailey on Sew, Mama, Sew
A Hexagon Robot Pillow by Jen Carlton Bailey on Sew, Mama, Sew
Scrappy Sunshine Potholder Tutorial by Kelly of Blue Bird Sews

Misc.
Patchwork Tote Bags by Susan of West Coast Crafty
Patchwork Draft Snakes by Susan of West Coast Crafty
Custom Tags by Megan of Monkey Beans
Christmas Tree Pants by Monica of Happy Zombie

PMQG Container Swap Round-up

We just couldn't contain ourselves!  Here is a round-up of the inspiration and tutorials for our container swap.

Kim's finished Pink Penguin Fabric Basket 
The Sometimes Crafter Fabric Boxes: Tutorial Here
Here are a whole bunch of awesome tutorials Kim Lumapas, our PMQG Programs Director rounded up to inspire you!


And the link to Carolyn's pattern: a collaboration with Anna Graham of noodlehead, that she donated to us to give away at our meeting:
Carolyn Friedlander's Social Tote 


Slow Sewing Studio Social Tote

If you missed the meeting we encourage you to find a partner and sew along. Hop over to our Member blog page and see if there is anyone who wants to play too! 

added 6/26/13
I stumbled across this nesting bowl pattern at a cuppa and a catchup yesterday. Not only is  it a lovely design, but Nova is donating 100% of the proceeds of the sales of her patterns from now until June 30th to the fund that was created for Kathreen Ricketson's children. You can read more about her in this blog post. Thank you Nova for organizing this!


PMQG charity quilting - January, February, + March

This year we're sharing a different charity quilting opportunity every month for any PMQG members who might be interested. January's featured organization was Bradley-Angle House, a shelter here in Portland that serves women and children escaping domestic violence. As Violet pointed out, it's the only shelter in Portland that's able to keep families living together as they work towards their new lives. Several PMQG members have teamed up to donate both small quilts for the Bradley-Angle families, and fabric for the women's sewing and quilting circles they host! Here's one quilt from our first round of donations in January - blocks donated by Cool Cottons, top and back finished at a Quilts for Quake Survivors bee, and beautifully quilted by Nancy.


February's charity is Craft Hope's littlest warriors project - they're collecting handmade soft hats and tote bags to give to children fighting cancer. The deadline is March 12 and you can make hats and bags for any age kid, from babies to teenagers, boys or girls, just make them colorful and fun! I just wrote up a simple tutorial for making a patchwork tote from two 12" (or similar-sized) quilt blocks, if you're interested in stitching one up too. Mine are log cabin, but any quilt blocks you like would be great! We're hoping to send out a nice PMQG package by the second week of March, so just let us know if you'd like to sew along! You can use any pattern you like - maybe my tote bag or Monica's Pick-a-Pocket Purse?


In March we'll be featuring Quilts of Valor, an organization that collects comforting, healing handmade quilts to give to returning combat veterans in honor of their service. More on them at the March meeting, but if you'd like to donate or sew for any of these charities, we'd love to have you - please email us at portlandmodernquiltguild at gmail.com!

Thank you to everyone who's contributed so far, and to all the members who've emailed with great suggestions for other charities to include this year. We look forward to twelve beautiful months of quilting craftivism with everyone who's interested!